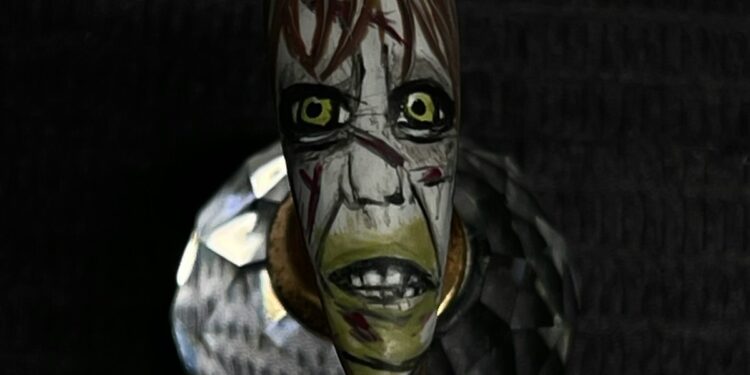
Bring the Horror of ‘The Exorcist’ to Your Fingertips
The Halloween season offers endless creativity for those who love intricate and spooky designs. This year, bring the haunting allure of ‘The Exorcist’ to life on your nails with a step-by-step guide by Yatzy M.C, a skilled nail technician from Orlando, Florida. You’ll learn how to recreate the infamous Regan character’s look right at your fingertips.
Materials Needed
- Jet black gel polish
- White gel polish
- Shading gel
- Light green gel polish
- Acetone
- Flat brush
- Ombré brush
- Dotting tool
- Matte topcoat
- Alcohol wipes
Step-by-Step Tutorial
Step 1: Base Coat
Start by applying a jet black gel polish over the entire nail. Cure under a UV lamp for 30 seconds.
Step 2: Outline Regan’s Face
Use white gel polish to draw a horizontal and vertical line forming a cross or ‘T’ shape on the nail. Next, outline an oval around the cross.
Step 3: Fill the Face
Fill the oval with the same white gel polish to create Regan’s face base.
Step 4: Eyes and Nose
With a shading gel, draw a ‘Y’ shape and another cross pattern. Do not cure this step yet. Add white gel to create the eye shapes.
Step 5: Define Features
Use a flat brush dampened with acetone to remove the previously drawn shading lines. Redraw the nose using shading gel, then highlight the eyes and nose using black gel.
Step 6: Emphasize Eyes
Apply black gel around the eyes. Gently blur the edges with a flat ombré brush. Cure for 60 seconds.
Step 7: Add Eye Color
With a dotting tool, dab light green gel polish in the center of each eye. Cure for 30 seconds.
Step 8: Form Regan’s Expression
Draw Regan’s mouth and a creepy smile using shading gel. Cure for the stipulated time, following gel instructions.
Step 9: Final Touches for Eyes
Add a black dot in each eye for pupils and use shading gel to create Regan’s rotted teeth.
Step 10: Scar Details
Using shading gel, mark scars on Regan’s face. For a realistic effect, use darker black shades to highlight the scar lines and a dark red for a bloody look.
Step 11: Adding Hair
With different shades of brown, draw strands of hair around Regan’s face for a wild appearance.
Step 12: Puke Effect and Finishing
Using the same light green polish used for the eyes, dab it around Regan’s mouth to simulate a puking effect. Cure it for another 30 seconds. Add more details around the nose to emphasize a scrunched appearance. Complete curing with a final 60-second timer.
Additional Tips
Apply a matte topcoat to finish. Cure this layer for 60 seconds, and wipe off any shine with an alcohol wipe for a spooky matte look.
This step-by-step guide provided by Yatzy M.C (@nails.by.yatzy), based in Orlando, reflects her expertise and creativity in the field of nail technology. Capture the eerie spirit of Halloween and ‘The Exorcist’ through this distinctive nail art.


