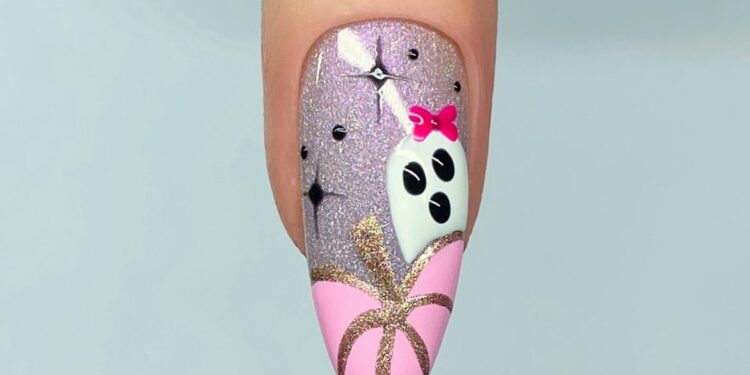
Introduction to Ghost Pumpkin Nail Design
Creating a unique and eye-catching nail design can transform your look, and what better way to embrace the fall season than with a ghost pumpkin nail design? Fie Pedersen, a renowned nail technician from Denmark, shares her expertise in creating this spooky yet chic nail art. Follow this step-by-step guide to master the ghost pumpkin design.
Materials Needed
Before you begin, ensure you have the following materials on hand:
- Base gel polish – ‘Angel Delight’ by Magpie Beauty
- ARTY gel paints in white, black, bubblegum, rose gold, and Barbie
- ARTY brushes sizes 6 and 9
- Top coat to finish off the design
Step-by-Step Tutorial
Step 1: Outline the Pumpkin
Begin by painting the outline of your pumpkin using your chosen color. Carefully trace the shape to provide a clear framework for the design. Use a steady hand to ensure symmetry. This serves as the foundation of your ghost pumpkin art.
Step 2: Fill and Cure
Once the outline is complete, fill in your pumpkin with the color. Make sure to apply an even coat to avoid streaks. Cure the nail under a UV lamp to set the color in place.
Step 3: Add Details with Glitter
Use a glitter gel paint to add lines and a stem to your pumpkin. This gives the design a pop and adds a festive touch. Cure the nail again to secure these details.
Step 4: Draw the Ghost
Paint a ghost shape using white gel paint so it appears to emerge from behind the pumpkin. The ghost should be subtle yet distinct, contributing to the design’s overall aesthetic. Cure the nail to ensure durability.
Step 5: Add Facial Features
With black gel paint, add eyes and a mouth to the ghost, giving it character and expression. Make sure these features are adequately sized to maintain balance within the design’s proportions. Cure to set the facial features.
Step 6: Final Touches
Enhance the design’s charm by painting a small bow on the ghost and adding some stars around the nail using bubblegum or rose gold gel paints. These small details make the design more playful and festive. Cure the nail one final time.
Conclusion
Finish by applying a top coat to seal the design, ensuring it lasts longer and adds a glossy finish. This ghost pumpkin nail art is perfect for the Halloween season or for those who simply enjoy a fun and fashionable twist to their nail designs. Try it out and impress with your nail art skills!
Don’t forget to use quality products like those from Magpie Beauty to achieve the best results. With this tutorial, creating stunning ghost pumpkin nails is a breeze, whether for yourself or your clients.


