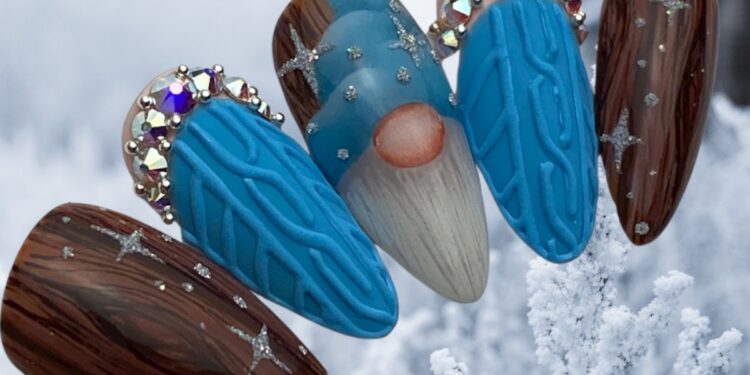
Introduction to Gnome Nail Art
Nail art is a perfect way to express creativity, especially during the festive season. This holiday, why not decorate your nails with an adorable gnome theme? Inspired by the classic charm of gnomes, this nail art design will bring the essence of the holidays to your fingertips. Guided by nail educator and technician Classic Nicole-Mully, known for her intricate designs, this tutorial will help you recreate stunning gnome nail art that encapsulates holiday warmth and joy.
Materials Needed for Gnome Nail Art
Before starting your delightful gnome nail art, make sure you have the following materials:
- Base coat and top coat
- Nude or light pink nail polish
- Red, green, and white acrylic paints
- Fine-tip nail brushes
- Dotting tool
- Top-quality nail glue
- Small, decorative nail gems
Step-by-Step Gnome Nail Art Tutorial
Step 1: Prep Your Nails
Begin by cleaning and shaping your nails. Apply a base coat to create an even foundation for your nail art design. This step ensures your nails are protected and the polish lasts longer.
Step 2: Create the Gnome Base
Use a nude or light pink nail polish for a natural skin tone effect on the nails. Let it dry completely. This will act as the background for your delightful little gnomes.
Step 3: Drawing the Gnome’s Hat
With a fine tip brush, use red acrylic paint to sketch the iconic tall hat of the gnome on each nail. Feel free to experiment with different styles – pointed, floppy, or accented with stripes.
Step 4: Add a Gnome Beard
Underneath the hat, paint a fluffy beard using white acrylic paint. This step can be quite fun and adds character to your tiny nail gnomes.
Step 5: Paint the Elf Shoes
At the tip of your nails, use green acrylic paint to design whimsical elf shoes. Enjoy the creative aspect as this step offers flexibility in how detailed or simple your shoes appear.
Step 6: Embellish with Sparkles
Add a hint of sparkle using a glittery nail polish across your entire nail or polish selected areas with glitter for a festive touch. Apply small gems near the gnome’s hat for added elegance.
Finishing Touches
Once you’ve completed your gnome art, let everything dry thoroughly. Use a high-quality top coat to seal in your design and add a glossy finish. This not only adds shine but also enhances the longevity of your nail art.
Conclusion
Gnome nail art is an enchanting way to celebrate the holidays while showcasing your creativity. Whether for a festive occasion or just to enjoy the holiday spirit, these nails are sure to impress. Remember, practice makes perfect, so have fun experimenting with different gnome designs and embellishments.
For more detailed inspiration and visual guides, check out the Nailpro November/December 2022 digital magazine to further refine your gnome nail art skills. Happy nail art creating!


