Introduction to Nail Stamping
Intricate nail art, known for its crisp and fine lines, often required extensive freehand skills and time in the past. However, with the advent of nail stamping, every nail artist can now create stunning designs with minimal effort. Using simple tools, nail stamping allows nail polish to be embedded in an engraved design and transferred onto the nail surface using a stamper.
Famed nail artist Melissa Fisk, creator of nailrotica.com, emphasizes that with practice, nail stamping becomes a quick and easy process for achieving impressive nail art.
Essential Tools for Nail Stamping
Nail stamping requires three basic tools: stamping plates, a scraper, and a stamper. Stamping plates, typically made of thin steel, host multiple etched designs ranging from small accents to detailed full-nail patterns. Notably, deeply etched plates often yield the best results.
Scrapers and stampers vary in shape, size, and material. Fisk suggests using stamping polishes for beginners, but regular polishes, barring glitter, can also work. The ideal polish is of medium consistency to ensure precise stamping.
Step-by-Step Guide to Nail Stamping
Step 1: Preparation
Ensure that you have everything you need within reach: stamping plate, stamping polish, scraper, stamper, paper towel, cotton balls, polish remover, tape, and quick-dry top coat.
Step 2: Base Application
Apply two coats of quick-dry top coat over your base polish. This aids in quickening the stamping process and fixing mistakes.
Step 3: Applying Stamping Polish
Position the stamping plate on a flat surface and apply polish over the chosen design. Use the scraper at a 45-degree angle to remove excess polish. The polished design should fill the grooves without leaving residue on the flat surface.
Step 4: Transferring the Design
Roll the stamper over the design using a firm, smooth motion. The right pressure is crucial—too much might spread the polish, and too little may leave gaps.
Step 5: Align and Stamp
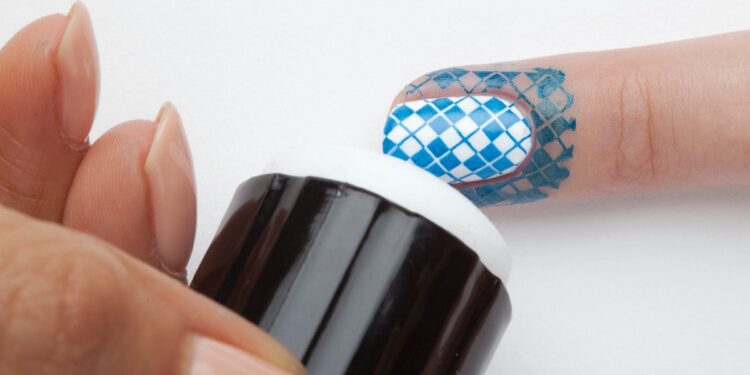
Align the stamper over the nail and gently roll it to transfer the design, ensuring speed to prevent the polish from drying on the stamper.
Step 6: Clean Up
Use a piece of tape to clean polish residue from the stamper and repeat the process for remaining nails. Clean any stray polish from the skin. Keep equipment clean for best results.
Step 7: Seal the Design
Seal the design with a top coat using a gentle touch to avoid smudging.
Fixing Common Mistakes
If mistakes occur, such as smeared designs or incomplete transfers, it may not always be necessary to start over. Use quick-dry top coats to create a surface that allows error correction without affecting the base polish.
A sticky lint roller or tape can help remove faulty transfers. For persistent errors, a gentle rub with a non-acetone polish remover can act as the remedy. Reapply a top coat to ready the nail surface for a second attempt.
Conclusion
Nail stamping is an art that, with practice, offers limitless possibilities for creative and unique nail designs. By mastering the techniques and tools, you can offer stunning nail art services that stand out.


