Introduction
Pink and white acrylic nails are a timeless classic in the realm of nail art, offering a clean and sophisticated look. However, perfecting this technique requires precision and patience. This comprehensive guide will walk you through each step of creating flawless pink-and-white acrylic nails, ensuring professional and salon-quality results every time.
Step 1: Preparation
Wash Hands Thoroughly
Start by washing your hands and instruct your client to do the same. Use a clean, dry nylon nail brush to scrub the nails. Ensuring that both your hands and the client’s hands are thoroughly dry is crucial. Proceed by filing and shaping the natural nails using a 180-grit file, aiming for a flat or square free edge. This shape will help the forms fit seamlessly beneath the nail edge. Then, use a very fine-grit buffer to gently remove the shine from the nail surface, being careful to avoid damage. For added precision, consider using a fine diamond, round-tip e-file bit on a low speed.
Step 2: Prepare the Nail Surface
Remove Dust from Nails
Employ a clean brush to remove any dust from the nails. Avoid touching the nails with your fingers to prevent oils from compromising the product’s adhesion.
Apply Dehydrator and Primer
After dust removal, apply a nail dehydrator to eliminate any remaining impurities and to dehydrate the nail plate. Choose between a sticky primer or a traditional acid-based primer to enhance adhesion. Apply the primer generously but cautiously, avoiding flooding the cuticles or sidewalls, and allow it to dry before proceeding with form application.
Step 3: Traditional vs. Reverse Application
Decide on Your Method
Consider whether you’d prefer a traditional or reverse application for the pink-and-white acrylics. In the traditional approach, apply the white product first. This technique maintains your focus and allows adjustment of the C-curve if necessary. Expect the liquid monomer to grow slightly milky; replacing the liquid before applying the pink product will keep the colors vibrant. For ease, apply the white powder for each nail tip in one ball, managing excess liquid for greater control.
Timing Smile Lines
Mastering the timing of wiping your smile lines is a learned skill. Using your sculpting brush, perfect the point and refine your smile line as the product sets. The goal is a crisp, professional finish.
Step 4: Application and Finalization
Applying the Pink Acrylic
Once the white has set, apply the pink product. Begin with a large ball placed at the nail plate’s center and press towards the smile line. Employ a wetter, smaller ball of pink above the cuticle, ensuring a smooth transition over the nail. Verify the thickness and location of each apex over critical stress areas, using clear powder to enhance volume without disturbing the smile line.
Remove Forms and Shape Nails
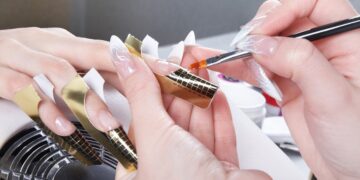
Detach the forms and shape all 10 nails using a hand file for consistent lengths and shapes. Then, refine the nail surfaces with a medium-grit e-file bit, blending the product near the cuticle to avoid ridges.
Finish with Smooth Buffing
Eliminate any residual dust and use a smooth buffer to polish the surface, creating beautifully contoured nails. Conclude with a gel sealant for a lasting shine.
Conclusion
Mastering pink and white acrylic nails can significantly enhance your nail artistry skills. Detailed preparation, precise application, and finishing touch are the keys to perfection. By following these steps, you’ll achieve elegant and durable pink-and-white nails that exude professionalism and beauty.


