


Unleash Your Creativity with Photo Nails
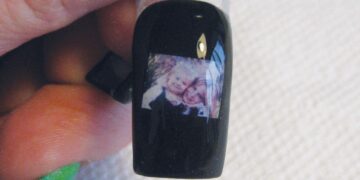
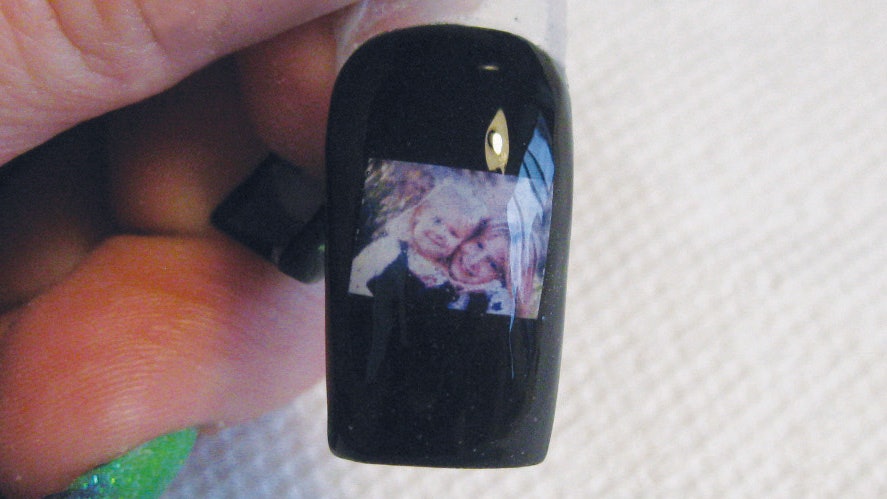
Nail art provides clients with a unique, personal touch, transforming everyday nails into miniature canvases that can showcase anything the imagination holds. Among the innovative designs, photo nails stand out—their allure lies in the personalization options they offer to clients. Imagine carrying your favorite memory, cherished pet, or beloved celebrity crush at your fingertips. This guide will walk you through creating stunning photo nails that capture individual passions and stories.
Why Choose Photo Nails?
Photo nails offer an unmatched personalization level, appealing to a wide variety of clients. Whether it’s a teen eager to display their favorite band, a bride wishing to feature her fiancé, or a pet lover infusing their pup into their artistry, the possibilities are endless. This unique style revamps traditional nail art into sentimental pieces that clients love to show off.
How to Create Photo Nails
Step 1: Preparation and Printing
The journey to creating impressive photo nails begins with acquiring suitable photos. Have clients email or text their chosen images. Utilize basic photo editing software on your computer to resize the images to the smallest possible size. Most printers allow you to create a ‘contact sheet’, which produces multiple small images on one paper. Opt for the thinnest, low-cost photo paper to keep the photos thin, allowing them to blend seamlessly onto nails.
Step 2: Cutting the Photos
Cutting the photos into the perfect size and shape is crucial. Tools like small scissors, an X-acto knife, or even a scrapbooking hole punch can be used. Scrapbooking punches are particularly versatile, providing various shapes like hearts or stars, adding an extra layer of fun to the nail art.
Step 3: Preparing the Nails
Before embedding photos, ensure a proper foundation. Have clients wash their hands thoroughly. If applying tips, refine them first to avoid a bulky appearance. Apply an acid-free primer for a stronger bond. Shape the photo by bending it around a brush handle to prevent it from protruding from the nail surface.
Embedding Photos in Acrylic Nails
Step 1: Apply a thin acrylic layer to the nail. Place the photo using tweezers or an orangewood stick, holding it until the acrylic sets.
Step 2: Once dull, use a C-curve to secure the photo. Add a second clear acrylic layer, ensuring a smooth application to avoid bubbles.
Step 3: Shape with a 180-grit file, avoid filing through the acrylic into the photo. Polish around and finish with a gel sealer.
Embedding Photos in Gel Nails
Step 1: Start with a builder gel layer, curing each coat as needed. Use a thin application to prevent bulk.
Step 2: Cleanse and shape the nail, maintaining a thin build.
Step 3: Attach the photo using brush-on glue, smoothing it with plastic to eliminate air bubbles.
Step 4: Cover with a clear hard gel, cure, and decorate as desired. Finish with a topcoat for durability.
Conclusion
Photo nails are a thrilling avenue, perfect for expressing individuality through captivating and personalized design. Whether for cherished memories or unique passions, they offer a sentimental connection between the client and their nail art. Utilize imagination and creativity, and embark on creating beautiful, meaningful art on nails. This unique form of nail artistry will not only satisfy your clients’ aesthetic desires but also resonate with personal stories and beloved memories. Embrace the artistry of photo nails, and inspire both yourself and your clients with endless possibilities.


