Understanding the Causes of Broken Nails
Nails are delicate structures that can easily break due to various factors. While incidents like cabinet drawers or car doors might seem like common culprits, according to Carla Collier, an education ambassador at Orly, the daily use of nails is often the main cause.
Daily activities can weaken nails over time. To prevent breakage, it’s essential to maintain nail health through regular use of oils and lotions. This keeps the nails flexible, reducing the chances of breaking. Collier emphasizes the importance of using gloves during tasks like cleaning or yard work that might be harsh on hands.
Choosing the Right Nail Length and Shape
While long nails can look appealing, they might not always suit individuals with an active lifestyle. Selecting a nail length and shape that complements one’s routine can significantly reduce the risk of chipping or breaking. It’s also important to manage clients’ expectations regarding how much artificial intervention they are comfortable with when fixing a broken nail.
Steps to Repair a Tear in the Nail
Step 1: Prepare the Nail
Begin by lightly buffing the surface of the nail to remove shine. Be gentle to avoid causing further damage. Clean the nail thoroughly with a nail cleanser or isopropyl alcohol to eliminate any oil and moisture.
Step 2: Apply Silk Wrap
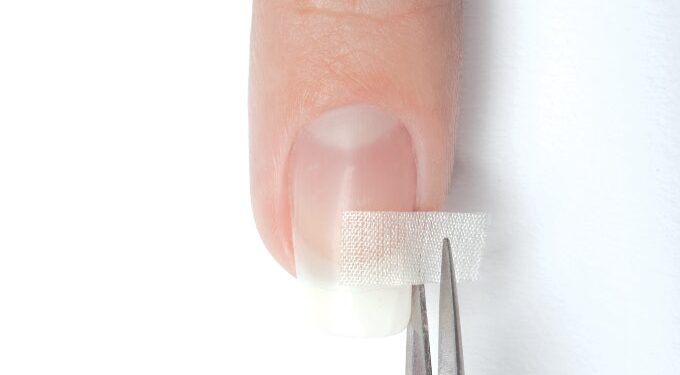
Cut a piece of adhesive silk wrap large enough to cover the break. Use tweezers to place it over the break smoothly. You may choose to cover just the break to avoid making the nail appear too thick.
Step 3: Secure the Wrap
Fit the silk to the nail, then saturate it with a gel base coat and flash cure. Apply another layer of gel base coat over the entire nail before curing again.
Step 4: Smooth and Finalize
Lightly buff the surface with a 240-grit sponge file to smoothen the repair. Complete by manicuring and polishing as usual, advising clients to care for the nail diligently until it grows past the free edge.
Steps to Repair a Chipped Nail
Step 1: Prepare the Area
Buff and cleanse the nail surface as previously directed. This prepares the nail for the repair process.
Step 2: Sculpt with Builder Gel
Apply a form and use builder gel to construct the missing nail corner. Ensure the natural nail slightly overlaps with the gel extension for better adherence.
Step 3: Cure and Polish
Once cured, remove the form and apply gel polish to the entire nail. Cure again before smoothing the surface with a buffer.
Step 4: Finish the Look
Apply a clear coat of polish—gel or traditional—cure if necessary, and complete the nail service.
It’s crucial to ensure clients take immediate attention to any future care needed and recommend a follow-up appointment if the repair involves acrylic or gel. Remember, tailored care and prevention can make all the difference in maintaining beautiful, healthy nails.


