Get Ready for the Holidays with Stunning Nail Designs
The holiday season is a magical time filled with joy, celebrations, and the perfect opportunity to showcase your creativity with vibrant nail designs. Whether your clients want something simple or extraordinary, holiday nail designs can encapsulate the festive spirit. Let’s delve into some fabulous ideas to enchant your clients this season.
Purple Holiday Nails: A Sophisticated Twist
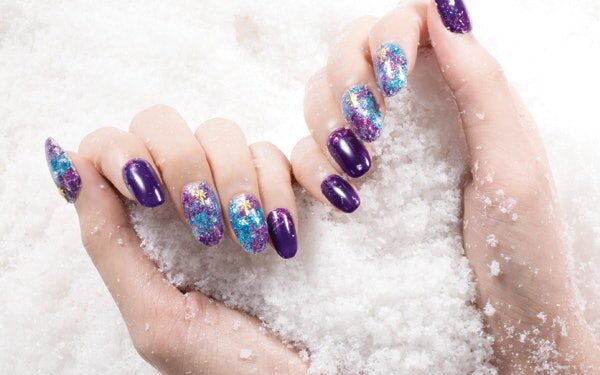
Purple adds a touch of elegance to holiday nails. Consider incorporating purple glitter or metallic finishes to create a visually stunning effect. These designs can be accented with tiny ornaments, snowflakes, or even golden touches to emphasize the festive mood.
Snowflake Nails: Winter’s Charm
Snowflakes are synonymous with winter and make perfect decorations for holiday nails. Start with a cool-toned base polish, like icy blues or purples, and delicately paint white snowflake patterns across the nails. Adding silver glitter can mimic the glistening effect of fresh snow.
Ornament Nails: Craft the Christmas Aesthetic
For those who want to adorn their nails like a Christmas tree, ornament nails are the way to go. Clients can choose traditional colors like red, green, and gold; or opt for unique combinations like pink and silver. Finish these designs with tiny decorative gems to mimic real ornaments.
Red Holiday Nails: The Classic Choice
Red is a classic color for holiday nails, symbolizing both Christmas and the holiday cheer. Design ideas include red French tips with gold stripes, or layering various shades of red for a gradient effect. This vibrant color pairs well with nearly any additional decor, ensuring versatility in design.
Santa Nails: Bring the Holiday Spirit
Spark up conversations with adorable Santa-themed nails. Whether through stickers or hand-painted art, Santa is an iconic symbol of the holiday. Let’s look at how to achieve a perfect Santa nail design step by step:
Santa Step-by-Step Instructions
1. Apply a base gel coat followed by two coats of silver glitter gel.
2. In the center of the nail, paint a nude gel circle.
3. Use white gel paint for the brim and pompom of Santa’s hat, as well as his beard and eyebrows.
4. Fill in Santa’s hat and nose with red gel paint.
5. Outline the design using black gel paint for definition.
6. Add red glitter gel to Santa’s hat and a small red crystal to the nose.
7. Use white art gel for a 3-D look on the hat, beard, and eyebrows.
8. Add shadow around Santa’s head with a black gel and base gel mix.
9. Apply a Santa sticker or hand-paint letters at the nail base and finish with a gel top coat.
Always cure after each gel application unless otherwise specified.
Share the Festive Nail Art Spirit
The key is to communicate with your clients about their preferences and invite them to explore photos for further inspiration. You can find a plethora of ideas from celebrated nail professionals to ensure your client’s vision comes to life. Don’t forget to join nail art communities online to share and explore creativity in full bloom.


